REQUIREMENTS:-
Red-hat Enterprise Linux 5 software CD/DVD (Free Down loadable
Details of download link in below Document)
Linux recommends a minimum disk size of above 12 GB,
And a minimum root partition (“/”) size of about 6-7 GB.
RAM size 512 Mb minimum
Nero software (preferably Version 7) (To Write Red-hat Linux ISO image to DVD)
Step1:
1. Go to the link http://www.utorrent.com/ and then click
‘Free Download’ to save torrent downloader files utorrent.exe
In your Desktop.
2. Double Click the above Downloaded file utorrent.exe and start
Your downloading using Torrent Down loader and Click next and
Follow the screens (attached screen shots of this as additional
Reference)
Click Next
Click I Agree
Click Next
Click Next
3. Go to the below link
http://thepiratebay.org/torrent/3976547/
Redhat_Linux_Enterprise_5_Exclusive_DVD_ISO
And download the Torrent File by Clicking below link
“DOWNLOAD THIS TORRENT (MAGNET LINK)” and the
Resultant torrent downloaded file will be
Redhat_Linux_Enterprise_5_Exclusive_DVD_ISO.3976547.TPB.torrent
4. Double Click the above Downloaded torrent file,
You will see the screen as below
Click OK.
After Clicking OK, Red-hat Enterprise Linux Version 5 .rar files will
Get downloaded.
5. Then you have to convert all the .rar files into single ISO image file.
Go to start—>All Programs–>Nero 7 Premium–>Nero Start Smart
In your computer and Click the “Make Data DVD” under the icon
“Data” as shown in screen shot below
And add your .rar files as shown in the below screen shot
And click add button on the top right corner to add all your .rar files.
6. Change the Current recorder as Image Recorder [DVD].shown in the
Below screen shot
Then click “Burn” button, after Clicking the
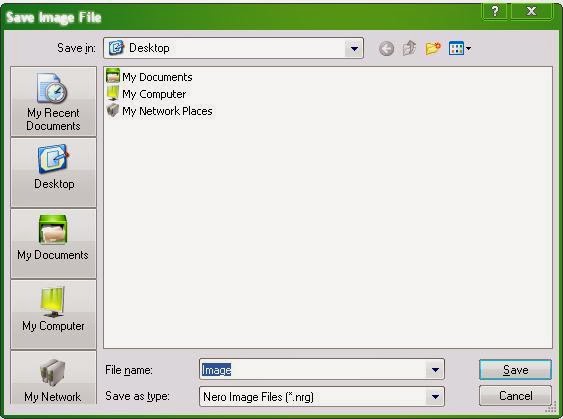
“Burn” button you have to specify your ISO image File location as shown in the below
Window
After you specified your image file location, then
Burn process starts
7. Once the image file Burned, you need to Create a
DVD, which should be bootable.
8. Creating bootable DVD using Nero Software is double Click your
Burned image file and then you will see a below window.
Then you have to click Burn. Now you will see a
below window
After completed the Burn process you will get bootable DVD.
Step2: The Bios settings described in this document (below 2 steps)
As in my PC (Personal Computer). Please note that mother
Board settings will vary from PC to PC.
Before insert your RHEL5 DVD in your DVD drive, you need to
Check mother board Bios settings. Follow the below steps to change
The bios settings
A. Restart the computer and Clicking DEL KEY or F1 key
in your key board. Then only Bios settings screen will come.
B. Change your first Boot Priority to DVD drive in boot
Menu, then save it and exit the Bios settings
Insert the above boo-table Red Hat Enterprise Linux DVD (version5) in
Your DVD drives and restarts your system (This reboot is required in
Order for your computer to detect bootable DVD).
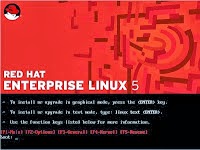
After restart Red Hat Installer should boot as shown in the figure below
Step 1-: We must choose the type of installation. In this example we will be
Using the graphical mode installation. Hit enter key to start the Installation.
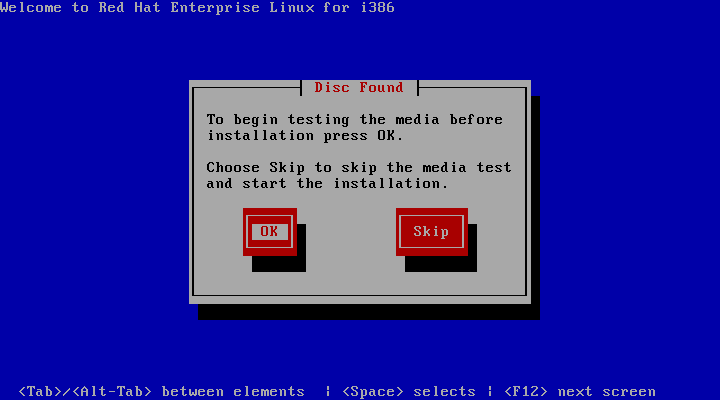
On the welcome screen the installation process will
Prompt you to check and test your installer. Select OK to test your
Media (CD/DVD), otherwise select skip to continue installing Red Hat
Enterprise Linux, shown in the figure below.
Button
Step 3:- Select your language and click next
Step 4:- You will be asked to enter your
installation number if you have
Enter it, otherwise skip entering installation number and click OK.
Step 5-: After installation number you will see the hard disk partitioning
Section. Select the Use free space on selected drive and click next.
If You select create custom layout option, then you must create the
Mandatory mount point as given below
/ = 6-7 GB / called as root partition.
/tmp = 400-600 MB
/boot= 200 MB
Swap= 2*RAM Size
Step 6:- Click next and in the Next screen, in the network devices window set
The host name to automatically via DHCP and click next
Step 7:- Select your region or location on the next window; you can click on
The map for your location (Asia/Karachi)
Step 8:- Enter the Root password on the next window, Root is the
Administrator account for Linux operating systems.
Installed on your Enterprise Linux Operating System. Preferably
Select all the Packages.
Operating system and these additional packages will begin, wait for
The system to finish the installation.
Step 12:- Installation in progress and will take
some time
Step 13:- Installation has been Completed Now Click
Reboot.
Step 14:- After Reboot the Operating System
Step 15:- Some Basic Feature, We have to Configure
Step 16 -: Agree the License
Enabled and select the services you need to pass through the
Firewall. You can also add TCP and UDP ports, otherwise select
Disabled and click forward
Step 19 -: Set Date And Time and Click Forward
Step 20 -: Create A User and Click Forward
Step 21:- Create you preferred username and password in the Create User
Window then click forward. You can test your sound card in the
Next window. After that you will be asked to insert additional CD’s to
Install. Since we don’t have any additional CD click the finish button.
Your Linux Enterprise 5 operating system is ready to use. You just
Need to login to the system and start using Linux Enterprise 5
Operating system.


It is really nice doc for beginners. keep it up . :)
ReplyDeletegood post , highly appreciable ,Mr pratik can you please post some basic Linux command and their utilities .it will be very helpful to us
ReplyDeleteThats really awesome, from the the downloading to the Installation anyone can learn to install by doing this way..
ReplyDeleteThanks Yogesh for your wonderful comment.
Delete